
Finding the Best Coffee for AeroPress Your Ultimate Guide
For a knockout cup of AeroPress coffee, your best bet is to start with freshly roasted, medium-roast beans. Origins like Ethiopia or Guatemala are fantastic launchpads, giving you a balanced and deeply flavorful brew right out of the gate.
But here’s the thing about the AeroPress: its versatility is its superpower. The perfect coffee is really up to you. A good medium roast just happens to be the sweet spot, steering clear of the sharp acidity you can get from light roasts while avoiding the smoky bitterness of the super dark stuff.
Why Your Coffee Choice Transforms Your AeroPress Brew
Think of your AeroPress as a high-performance camera—it’s an incredible tool, but the final picture is only as good as the subject you point it at. In our world, the coffee beans are the subject. Choosing the right ones is the single most important step to unlocking a truly memorable brew.
Instead of hunting for one single "best" coffee, it's way more rewarding to understand how different beans, roasts, and grinds can create wildly different results. You can pull everything from a bright, fruity shot to a rich, chocolatey cup just by swapping out your beans.
It all boils down to four key factors:
- Roast Level: This sets the foundational flavor. Light roasts are bright and acidic, medium roasts are balanced and sweet, and dark roasts are bold and smoky.
- Coffee Origin: This is where the bean’s personality comes from. Think of the classic berry notes of an Ethiopian coffee versus the deep chocolate tones from a Guatemalan.
- Freshness: Freshly roasted beans are packed with the aromatic compounds that deliver that "wow" factor. Old beans taste flat. Period.
- Grind Size: This is your control knob for extraction. Get it wrong, and your coffee might taste sour (under-extracted) or bitter (over-extracted). Get it right, and it’s pure magic.
Finding Your Perfect AeroPress Coffee
The AeroPress has become a cult classic for a reason. It's ridiculously flexible and portable, making it a go-to for brewers at home and adventurers on the trail. This demand for great coffee anywhere has fueled a huge boom in portable coffee makers.
In fact, the portable coffee maker market was valued at around USD 5.83 billion in 2025 and is expected to hit USD 9.94 billion by 2033. That's a lot of people who refuse to settle for bad coffee, whether they're at their desk or a campsite. You can learn more about the rise of portable brewing on SkyQuestt.com.
To make things a little easier, check out this decision tree. It's a simple visual guide to how roast, origin, and grind work together to shape your final cup.
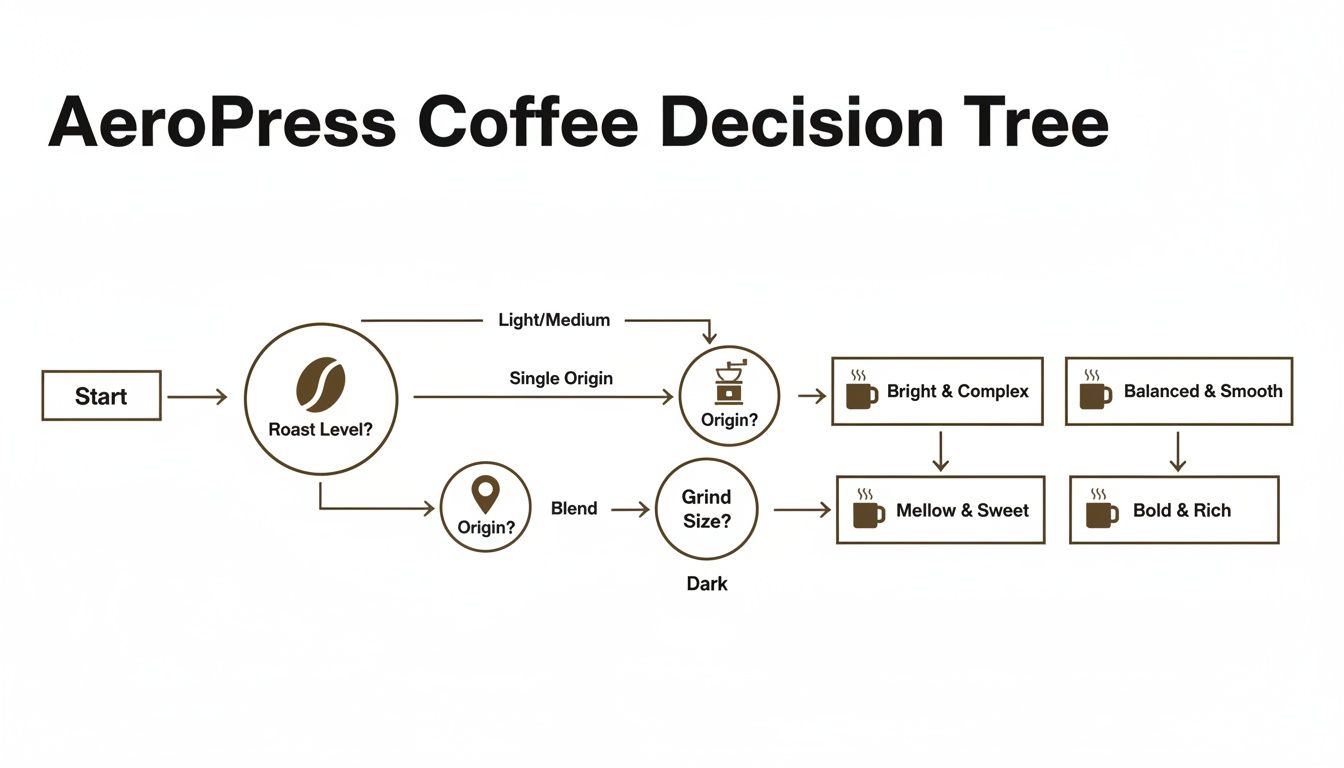
As you can see, the journey starts with picking a roast that matches the taste you're after—bright, balanced, or bold. From there, you can fine-tune your brew by choosing an origin and dialing in your grind. Once you get the hang of these variables, you become your own expert barista, crafting the perfect cup every single time.
To pull it all together, here’s a quick reference table.
Quick Guide to AeroPress Coffee Characteristics
| Coffee Characteristic | Impact on Your Brew | Best For... |
|---|---|---|
| Roast Level | Establishes the core flavor profile. Light roasts are acidic and fruity, mediums are balanced, darks are bold. |
Medium Roast: A versatile, crowd-pleasing starting point. Light Roast: Bright, tea-like flavors. |
| Origin | Determines the inherent tasting notes. Think floral Ethiopian, nutty Colombian, or chocolatey Guatemalan. |
Single Origin: Exploring distinct, unique flavors. Blends: A balanced and consistent cup. |
| Freshness | Crucial for flavor. Freshly roasted beans (within 2-3 weeks) offer maximum aroma and complexity. Stale is flat. | Everyone! Always check the roast date on the bag, not just the "best by" date. |
| Grind Size | Controls how quickly water extracts flavor. Too coarse is sour; too fine is bitter. A medium-fine grind is ideal. | Tinkering. Adjusting your grind is the fastest way to fix a brew that tastes "off." |
This table is a great cheat sheet, but the real fun is in the experimenting. Grab a few different bags of beans and see what you discover—that's what makes the AeroPress so great.
How to Choose the Right Roast for Your Perfect Brew
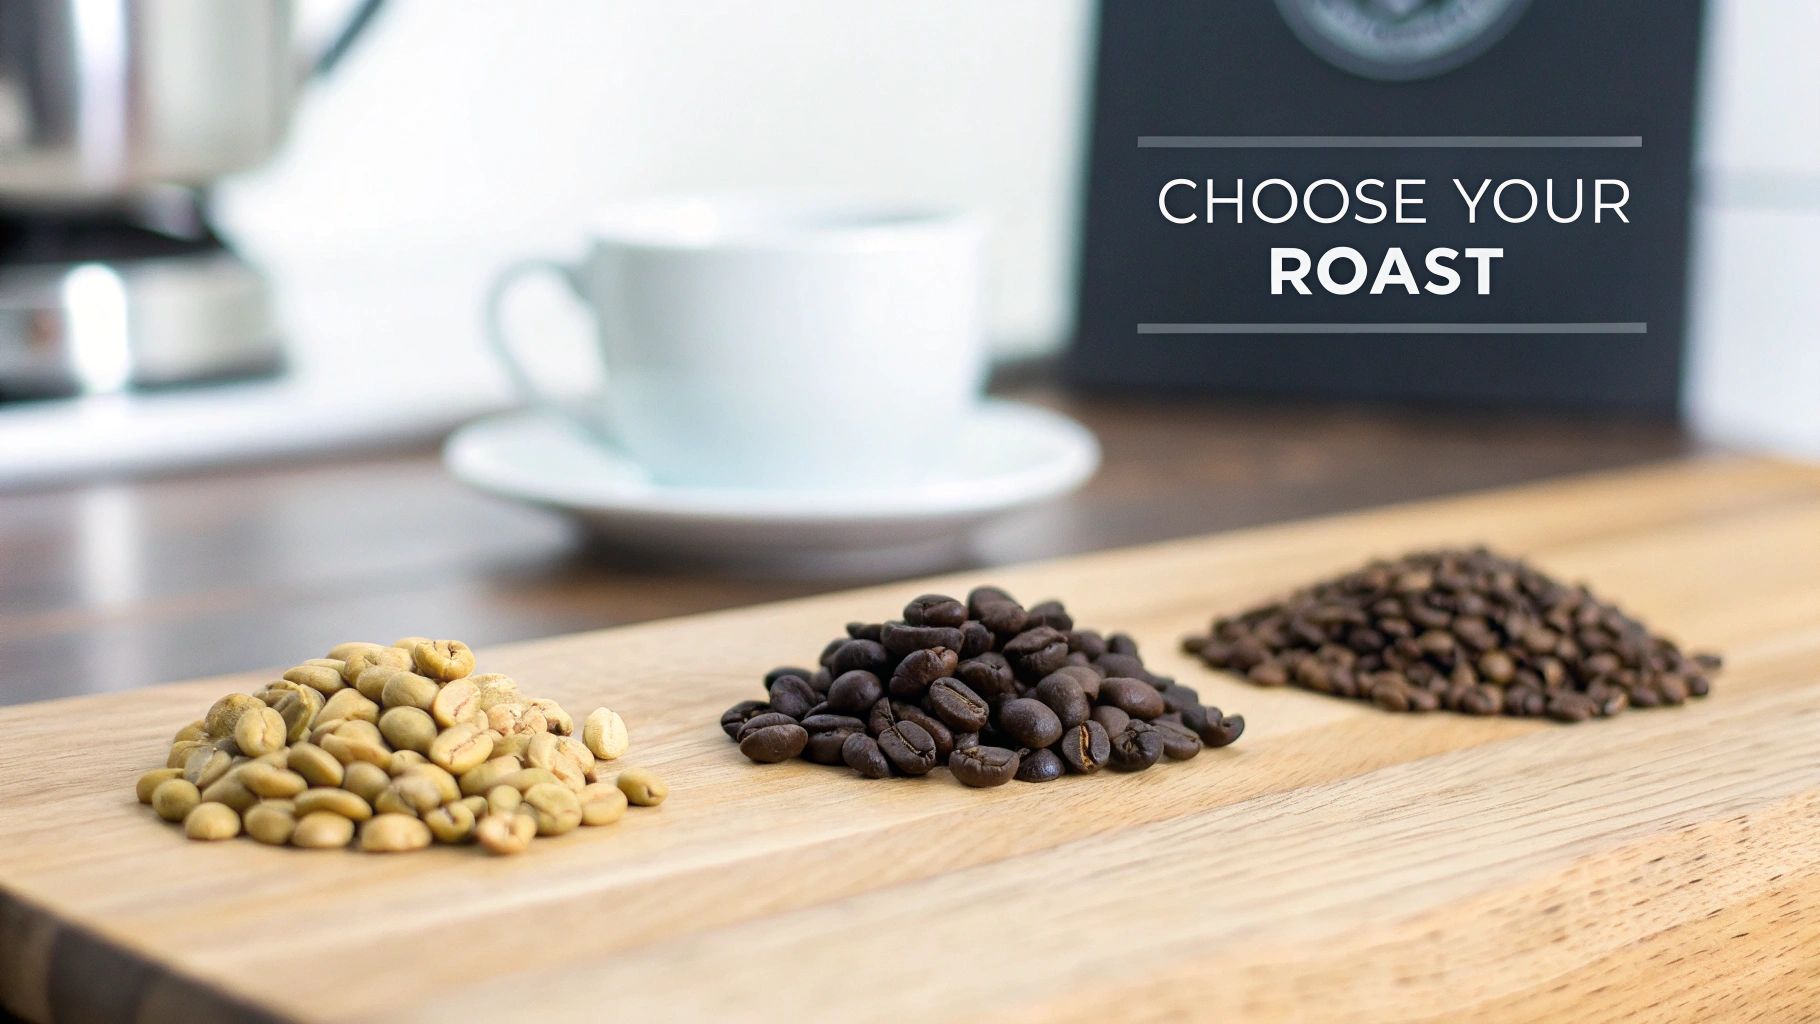
Picking the right roast level is a lot like learning how to toast bread just the way you like it. It's the first real decision you make, and it sets the stage for everything that follows in your AeroPress. Each profile—light, medium, and dark—pulls a completely different personality out of the coffee bean.
Think of it this way: a light roast is like pale, lightly toasted bread, where you can still taste the complex notes of the original grain. A medium roast is that perfect golden-brown sweet spot, balanced and familiar. And a dark roast? That’s well-toasted bread, where the bold, roasty flavors from the process itself take over.
The AeroPress is a genius of a brewer because its fast, pressurized method can bring out the best in any roast. It’s versatile enough to coax out the delicate, floral notes of a light roast or pull the deep, rich flavors from a dark one without making things bitter.
Light Roast: The Origin Story in a Cup
A light roast is all about preserving the bean's true, unadulterated character. Roasters drop these beans from the roaster just after the "first crack"—a sound a lot like popcorn popping—which means the coffee holds onto more of its original flavors, oils, and acidity.
When you brew a light roast in an AeroPress, you’re tasting the coffee’s terroir—the unique soil, climate, and altitude where it was grown. Expect bright, vibrant, and often fruity or floral notes. You might pick up hints of blueberry from an Ethiopian Yirgacheffe or a zesty citrus note from a Kenyan bean. Thanks to the quick immersion and pressure, the AeroPress creates a beautifully clean, almost tea-like cup that lets these delicate flavors sing.
- Flavor Profile: Bright, acidic, floral, fruity, citrusy.
- Best For: Coffee drinkers who love exploring the subtle, complex flavors of single-origin beans and prefer a brew with a lighter body.
- AeroPress Tip: A slightly finer grind and a quick plunge can really highlight that brightness without letting it turn sour.
Medium Roast: The Crowd-Pleasing Sweet Spot
If you're just starting your AeroPress journey—or even if you're a seasoned pro—a medium roast is the perfect place to play. This roast profile is the ultimate diplomat, striking a beautiful balance between a bean’s origin flavors and the delicious notes that develop during roasting.
Roasters take these beans a little further, past the first crack but stopping before the second. This mellows out the bright acidity you find in light roasts and introduces deeper, sweeter flavors like caramel, milk chocolate, and roasted nuts. It’s that classic "coffee" flavor most of us know and love, just with way more complexity and smoothness.
The AeroPress absolutely shines with medium roasts. It can extract all that balanced sweetness in under two minutes, giving you a consistently smooth, rich, and satisfying cup that’s perfect for your daily ritual.
Take our medium-roasted Guatemalan, for example. In an AeroPress, it delivers comforting notes of chocolate and toffee, creating a full-bodied brew that’s both deeply flavorful and incredibly smooth. It's the reliable, delicious choice that never lets you down.
Dark Roast: Bold, Smoky, and Intense
A dark roast is for anyone craving a powerful, bold, and intense coffee experience. These beans are roasted right up to the "second crack" and sometimes beyond, which causes oils to rise to the surface and creates that classic shiny, dark look. At this point, the roasting process itself becomes the main flavor.
The bean's original, more delicate flavors are replaced by deep, smoky, and bittersweet notes. Think dark chocolate, burnt caramel, and a rich, heavy body. While some brewers can make dark roasts taste bitter or ashy, the AeroPress handles them with surprising finesse.
The secret is control. By using a slightly coarser grind and a shorter brew time (think 60-90 seconds), you can extract all that bold, syrupy richness without the harsh bite. The result is a powerful, low-acid cup that stands up beautifully to a splash of milk, making it ideal for creating strong, latte-style drinks at home or out on the trail.
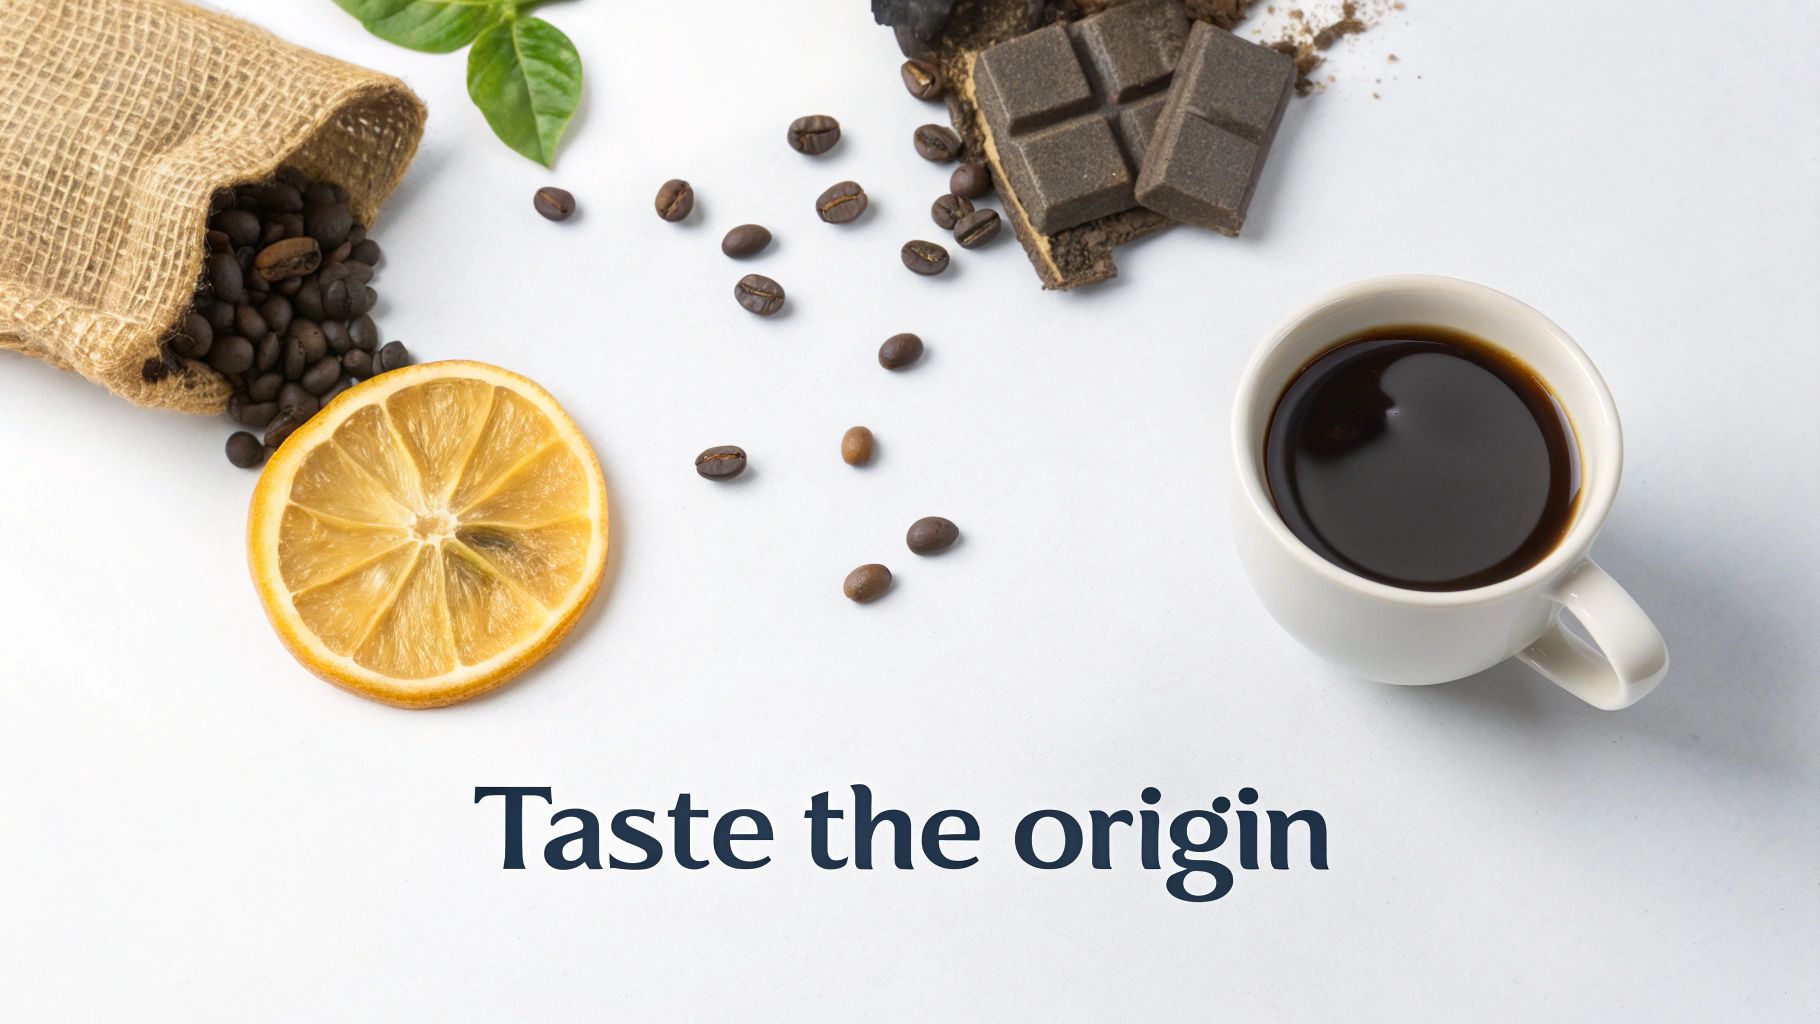
Exploring Coffee Origins and Their Flavor Stories
Choosing a coffee is a lot like picking a travel destination for your taste buds. Every coffee-growing region has its own unique flavor story, shaped by the soil, altitude, and climate—a combination the pros call terroir. Just like a wine from Bordeaux tastes nothing like one from Napa, coffee beans carry the distinct signature of where they grew up.
The AeroPress is your passport to these global flavors. Its quick, clean brewing method is fantastic at drawing out the subtle, unique notes of a bean, letting you taste its origin story with incredible clarity. This is what makes it so much fun—the coffee's true personality gets to shine right through.
The Bright and Floral Notes of Africa
When you think of African coffees, especially from Ethiopia or Kenya, think bright, vibrant, and complex. These beans are famous for their lively acidity and often have a delicate, almost tea-like body that’s incredibly refreshing.
- Ethiopia: As the legendary birthplace of coffee, Ethiopia produces beans with dazzling floral aromas and fruity notes of blueberry, bergamot, and lemon. Brewing a light-roasted Ethiopian Guji in an AeroPress gives you a clean, juicy cup that highlights its natural sweetness without a hint of bitterness.
- Kenya: Kenyan coffees are known for their powerful, wine-like acidity and bold notes of blackcurrant, grapefruit, and even tomato. The AeroPress perfectly captures this bright intensity, creating a cup that’s both crisp and deeply flavorful.
If you love a lively, aromatic cup and want to explore the more delicate side of coffee, these are the origins for you.
The Balanced and Sweet Flavors of Latin America
Latin American coffees are often the go-to for a classic, comforting cup. They typically offer a perfect harmony of sweetness, acidity, and body, with familiar flavors of chocolate, nuts, and caramel. Honestly, they're a fantastic starting point for any AeroPress user.
Guatemalan beans, especially from the Antigua region, are celebrated for their rich, full body and decadent notes of dark chocolate and toffee. When you brew them in an AeroPress, these qualities create a satisfyingly smooth and robust cup that is just consistently delicious. It's no wonder a good Guatemalan is so often recommended for AeroPress beginners.
Similarly, beans from Brazil's Cerrado Mineiro region are known for their low acidity, creamy body, and sweet, nutty flavors. They produce a dependable and mellow brew that's perfect for your daily driver.
By focusing on beans from a specific place, you get a pure expression of that region's terroir. To dive deeper, check out our guide on what is single origin coffee and why it matters for your brew.
It’s clear that people are getting more serious about their coffee. It's not just about better gear; it's about finding higher-quality beans that tell a compelling story. In one recent year, the AeroPress official store generated USD 9.9 million in revenue, which shows that coffee lovers who invest in top-tier brewers are also invested in sourcing exceptional coffees.
Coffee Origin Flavor Guide for AeroPress
To help you choose your next flavor adventure, we've put together a quick guide on how different origins typically taste when brewed with an AeroPress.
| Origin (Example) | Dominant Flavor Notes | Why It Works in an AeroPress |
|---|---|---|
| Ethiopia (Guji) | Blueberry, Jasmine, Bergamot, Lemon | The fast, clean extraction highlights its bright acidity and delicate floral aromas, creating a vibrant and juicy cup without introducing any bitterness. |
| Guatemala (Antigua) | Dark Chocolate, Toffee, Roasted Nuts, Mild Spice | The full immersion method perfectly extracts its rich, syrupy body and deep sweetness, resulting in a smooth, balanced, and comforting brew every time. |
| Brazil (Cerrado) | Milk Chocolate, Peanut, Caramel, Low Acidity | AeroPress brewing enhances its creamy texture and nutty sweetness, producing an incredibly smooth and mellow cup that is exceptionally easy to drink. |
| Mexico (Chiapas) | Brown Sugar, Green Apple, Orange, Delicate Sweetness | The pressure-plunge captures its crisp acidity and subtle fruit notes, making for a clean, light-bodied coffee with a refreshingly sweet finish. |
Ultimately, exploring different origins is one of the most exciting parts of the coffee journey. Whether you prefer the bright, fruity pop of an African coffee or the rich, chocolatey comfort of a Latin American bean, the AeroPress is the perfect tool to unlock their unique and delicious stories.
Mastering Freshness and Grind Size
So you've picked your roast and you know the flavor profile you're after. Now what? The final leap from a good cup to a truly great one comes down to two simple things: freshness and grind size.
Getting these right gives you complete control over your AeroPress brew, turning a morning routine into a craft. Think of it like cooking. Freshly ground black pepper has an intense, room-filling aroma that transforms a dish. The pre-ground stuff in a shaker? It's just dull, dusty, and forgettable. Coffee is exactly the same.
When beans are roasted, they develop hundreds of aromatic compounds that create all those delicious flavors we love. But these compounds are fragile and start to disappear almost immediately. Freshness isn't just a coffee-snob buzzword; it's the secret to unlocking the vibrant, nuanced flavors the roaster worked so hard to create.
Why Freshness Is Everything
Forget the "best by" date on a bag of coffee. The only date that matters is the roast date. This tells you exactly when the beans were roasted, giving you a clear window into their peak flavor.
For most beans, that sweet spot is between 4 to 14 days after roasting.
During this time, the beans have had a chance to "de-gas" (release CO2 trapped during roasting) but haven't started to lose their aromatic punch. Brew too early, and the gassy beans can lead to an uneven brew. Wait too long, and you're left with a cup that’s flat, lifeless, and often bitter.
Your goal is to use coffee when it’s at its most expressive. A bag of beans from the grocery store with a "best by" date six months away might have been roasted a year ago. Always look for a roast date—it’s your guarantee that you’re starting with the best possible ingredients for your AeroPress.
Once you have those fresh beans, you've got to keep them that way. Our guide on how to store coffee beans properly has all the tips you need to lock in that flavor and aroma for as long as possible.
Getting the Grind Right for Your AeroPress
If freshness is about the quality of your ingredients, grind size is your main cooking technique. It’s what controls the extraction rate—how quickly water pulls flavor out of the coffee grounds. And because the AeroPress is so versatile, there’s no single "correct" grind. It all depends on your recipe.
Picture pouring water through different materials. With large pebbles (a coarse grind), the water rushes through almost instantly. There’s barely any interaction. But pour it through fine sand (a fine grind), and it takes much longer to work its way through the tightly packed particles. That’s a perfect analogy for how grind size affects your coffee.
A finer grind creates more surface area, making extraction fast and intense. This is ideal for quick, espresso-style AeroPress recipes. A coarser grind, on the other hand, slows everything down, which is better for longer, full-immersion brews where you want to avoid pulling out any harsh, bitter flavors.
How to Dial In Your Perfect Grind
Fixing your grind is the fastest way to troubleshoot a bad cup of coffee. By simply tasting your brew, you can make small adjustments to hit that perfect balance.
Here's a quick guide:
- Sour or weak coffee? This is a classic sign of under-extraction. Your grind is too coarse, and the water didn't have enough time to grab the good stuff. The fix: Grind finer.
- Bitter or harsh coffee? You've got over-extraction. The grind is too fine, and the water pulled out too much, including the unpleasant bitter compounds. The fix: Grind coarser.
A great place to start is with a medium-fine grind, something like the texture of table salt. It's a fantastic, all-purpose setting for most standard AeroPress recipes. From there, tweak it finer for more punch or coarser for a cleaner, gentler cup. The best coffee for your AeroPress is the one you’ve dialed in just for you.
AeroPress Brewing Recipes for Any Situation

Alright, you've picked your beans—now for the fun part. The real beauty of the AeroPress is its playground-like nature; it practically begs you to experiment. But every good brewer knows that having a few bulletproof recipes in your back pocket is the secret to consistent, amazing coffee.
Think of these recipes less like rigid rules and more like trusted starting points. They’re designed to get you a fantastic cup right off the bat, but they're also the perfect foundation for you to start tweaking and dialing in your personal perfect brew.
Whether you're after a quick jolt of caffeine or a slow, contemplative cup, we've got a method for the moment. We’ve broken down three distinct recipes for three very different situations, complete with precise measurements to guide you from bean to bliss.
Recipe 1: The Quick Energy Shot
This is your go-to when you need a fast, concentrated shot of coffee that packs the punch of espresso. It's the perfect morning kick-starter or mid-afternoon reset. We're using a finer grind and a short, sharp plunge to create a rich, syrupy concentrate that gets the job done.
It's brilliant on its own, but it's also the perfect building block for an Americano (just add hot water) or a latte-style drink (add your favorite steamed milk). This one is all about speed and power.
What You'll Need:
- Coffee: 18g of a medium or dark roast.
- Grind: Fine (think table salt).
- Water: 60g of water just off the boil (around 205°F / 96°C).
- Method: Standard (right-side up).
Step-by-Step Instructions:
- Pop a paper filter in the cap, give it a quick rinse with hot water, and twist it onto the AeroPress chamber.
- Place the chamber directly on a sturdy mug.
- Add your 18g of finely ground coffee and give it a little shake to level the bed.
- Start your timer and pour all 60g of hot water over the grounds in one quick motion.
- Immediately start plunging with steady pressure. You're aiming to finish in about 20-25 seconds. You'll know you're done when you hear that satisfying hiss.
Recipe 2: The Classic Full Cup
For those slower moments when you crave a smooth, full-bodied, and complex cup, the inverted method is your best friend. By flipping the AeroPress upside down, you turn it into a full immersion brewer, letting the coffee and water steep together without any pesky dripping. This gives you total control over the brew time.
This technique is a favorite for a reason—it pulls out the nuanced, delicate flavors of your beans, especially single origins, and produces an incredibly clean and balanced cup.
The inverted method is beloved in the specialty coffee world because it marries the best of immersion brewing (like a French press) with the clean finish of a paper filter. You get all the body without any of the grit.
What You'll Need:
- Coffee: 15g of a light or medium roast.
- Grind: Medium-fine (like coarse sand).
- Water: 240g of water at 200°F / 93°C.
- Method: Inverted (upside down).
Step-by-Step Instructions:
- Push the plunger into the chamber just far enough to create a seal and place it upside down on your counter.
- Add your 15g of coffee grounds.
- Start your timer and pour all 240g of water into the chamber. Give it a gentle stir for about 10 seconds.
- Screw the rinsed filter and cap on top and make sure it's secure.
- Let it all steep until your timer hits 2 minutes.
- Carefully flip the whole setup onto your mug and press down slowly and steadily for about 30 seconds.
Recipe 3: The Go-To Daily Brew
This is the standard, no-fuss recipe that just works. Every single time. It's the perfect middle ground between speed and quality, making it a reliable workhorse for your daily coffee ritual. It’s quick, cleanup is a breeze, and the results are consistently delicious.
If you're looking to really master this method and others, our complete AeroPress brewing guide provides even more tips for achieving smooth coffee every time. Think of this recipe as the foundation for your everyday coffee excellence.
What You'll Need:
- Coffee: 17g of your favorite all-around coffee (blends are great here).
- Grind: Medium.
- Water: 250g of water at 203°F / 95°C.
- Method: Standard.
Step-by-Step Instructions:
- Set up your AeroPress the standard way, on top of a mug with a rinsed filter.
- Add 17g of coffee.
- Start a timer and pour in 250g of water, making sure to wet all the grounds.
- Gently insert the plunger just enough to create a vacuum seal, which will stop any coffee from dripping through.
- Let it steep for 90 seconds.
- Press the plunger down firmly and consistently for another 30 seconds until you hear the hiss. Enjoy your perfect daily cup
Your AeroPress Questions, Answered
Even with the best beans and a solid recipe, a few questions always pop up when you're getting to know a new brew method. The AeroPress is incredibly forgiving, but a few key details can take your daily coffee from "good" to "I can't believe I made this at home."
We've gathered the most common questions we hear from fellow coffee lovers right here. Think of this as your go-to guide for troubleshooting, refining your technique, and getting the confidence to start playing around with your own recipes.
What Is the Best Water Temperature for AeroPress?
The sweet spot for an AeroPress brew is usually somewhere between 175°F and 205°F (80°C to 96°C). But don't get hung up on a single number—think of temperature as your flavor dial.
Hotter water extracts flavor much more quickly and powerfully, while cooler water is gentler and slower on the draw.
- For Dark Roasts: Go cooler. Aim for around 175°F to 185°F (80°C to 85°C). This coaxes out all those rich, chocolatey notes without pulling in any of the harsh bitterness that can come from over-brewing.
- For Light Roasts: Turn up the heat. You'll want to be closer to 195°F to 205°F (90°C to 96°C). These denser beans need that extra energy to unlock their delicate, bright, and fruity flavors.
A great place to start for any medium roast is right in the middle, around 200°F (93°C). And if you don’t have a fancy variable-temp kettle? No problem. Just let your boiling water sit for 30 to 60 seconds before you pour.
Should I Use a Paper or Metal Filter?
This is all about personal preference for the texture and body you want in your final cup. Neither one is "better," but they create noticeably different coffees, making this a fun and cheap way to switch things up.
A paper filter is like a super-fine sieve, catching almost all of the coffee oils and tiny particles. The result is a brilliantly clean, crisp, and light-bodied cup where flavor clarity is off the charts. It’s perfect for showing off the delicate floral and fruit notes in a single-origin light roast.
A reusable metal filter, on the other hand, has larger holes. It lets more of those natural oils and some fine sediment sneak through into your mug. This gives you a fuller, richer body and a more robust mouthfeel that many people love, especially for medium and dark roasts.
If you love the full-bodied texture of a French press but hate the sludge at the bottom, a metal AeroPress filter is your new best friend. You get all that richness without the grit.
Why Does My AeroPress Coffee Taste Bitter?
Bitter coffee is almost always a classic case of over-extraction. It happens when the hot water hangs out with the coffee grounds for too long or just gets too aggressive, pulling out unwanted compounds that taste harsh. Luckily, the AeroPress gives you a few easy ways to fix it.
Here are the usual suspects and how to dial them back:
- Your Grind Is Too Fine: An espresso-like powder has a massive surface area, so it extracts in a flash. Solution: Coarsen up your grind. Aim for something that feels more like table salt or coarse sand.
- Your Water Is Too Hot: Boiling water can literally scorch the grounds, especially with darker roasts. Solution: Drop your temperature. Stay below 205°F (96°C) and see how it changes things.
- You Steeped for Too Long: Letting the coffee and water sit together for ages is a one-way ticket to bitterness. Solution: Shorten your total brew time. For most standard recipes, try plunging around the 1:30 to 2:00 minute mark.
The trick is to adjust just one of these things at a time. The easiest and most impactful change to start with is almost always your grind size.
Can I Make More Than One Cup at a Time?
You sure can, though the standard and Go models are really designed for single servings. Your best bet for serving two is to brew a concentrated "shot" of coffee and then dilute it with hot water, just like making an Americano.
Just use a stronger ratio—say, 20g of coffee to 100g of water. Plunge that concentrate, split it between two mugs, and top them both off with hot water until they reach a strength you like.
For anyone who regularly brews for two or more, the AeroPress XL is a game-changer. It was built specifically for larger batches and can brew up to 500ml of coffee at once, saving you from having to brew back-to-back.
Ready to find the perfect beans for your next brew? At Lost Without Coffee Co., we source and roast incredible coffees that absolutely sing in an AeroPress, from the bright, fruity notes of our Ethiopian Guji to the rich, chocolatey comfort of our Guatemalan Antigua. Find your new favorite at https://www.lostwithoutcoffee.com.