
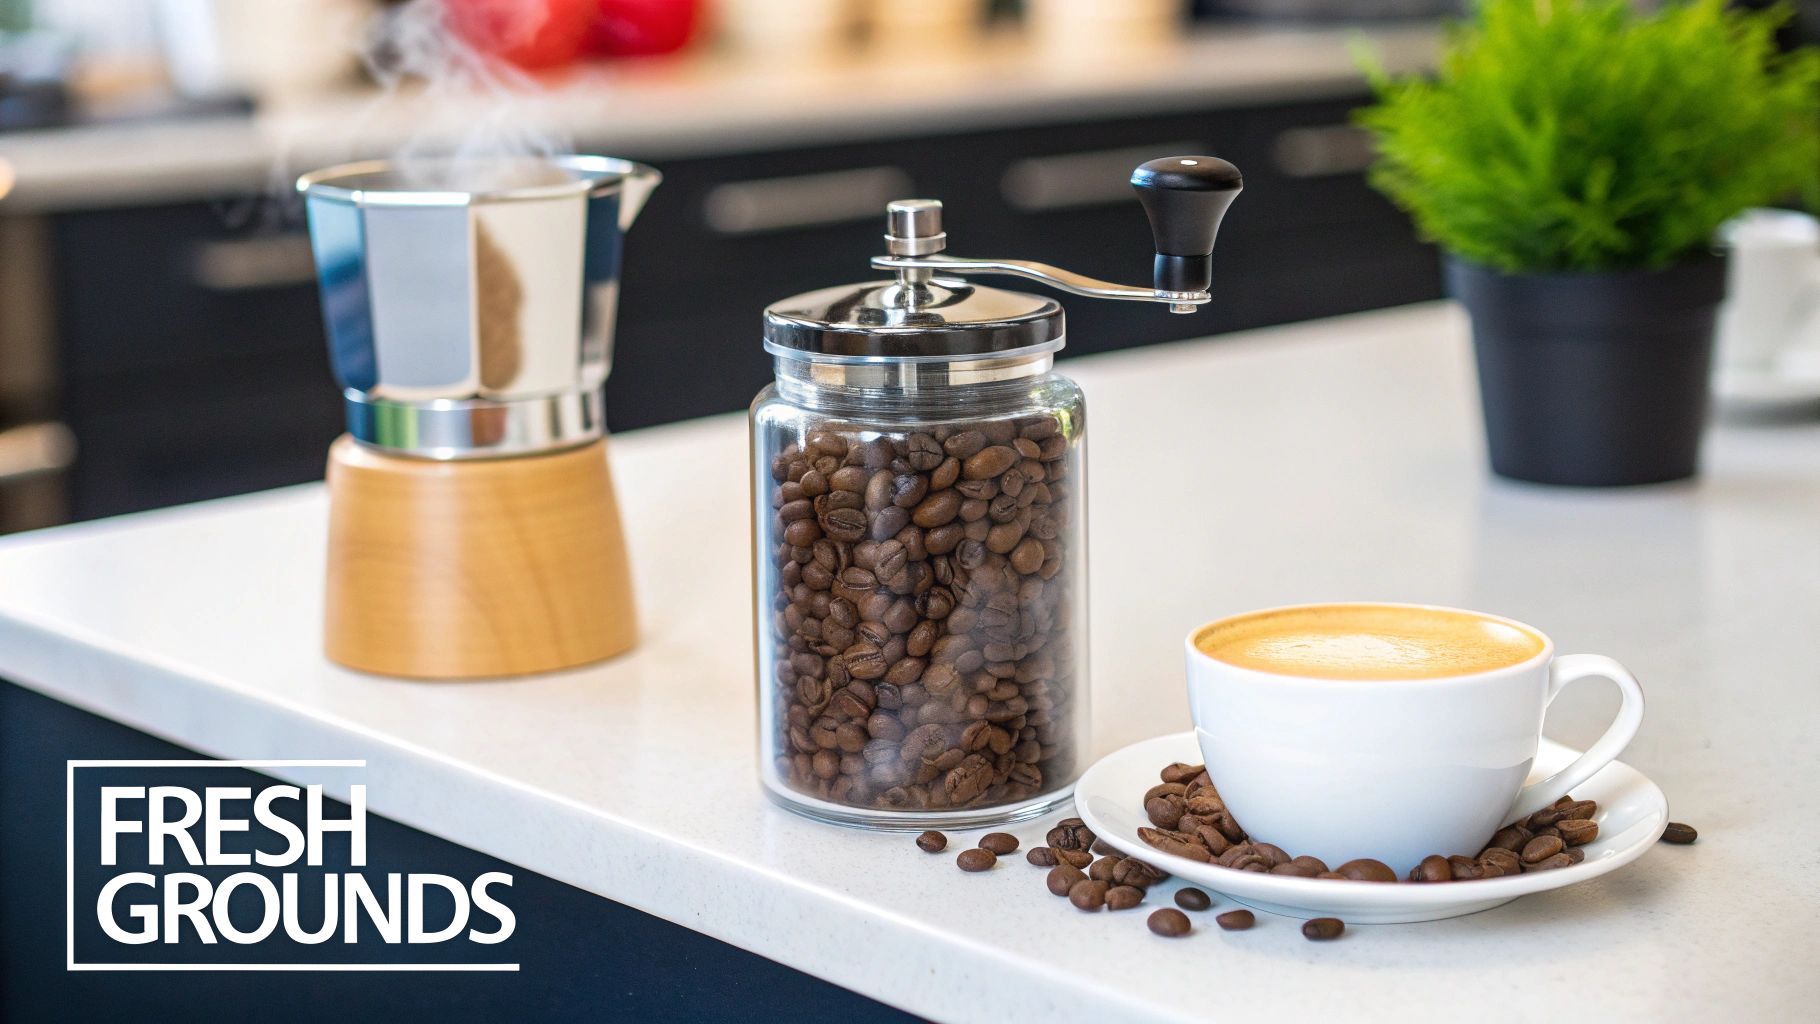
How to Grind Coffee Beans at Home for Perfect Flavor
If you're serious about upgrading your coffee game, the single biggest leap you can take is grinding your own beans. It's the secret that turns a decent cup into something truly special, unlocking the vibrant, aromatic flavors that make specialty coffee worth the effort.
Why Grinding Fresh Makes a World of Difference
Think of a coffee bean as a perfect little time capsule, meticulously protecting hundreds of delicate oils and aromatic compounds. The moment you grind it, you shatter that protection and the countdown begins.
The number one enemy of fresh coffee? Oxygen. Grinding dramatically increases the bean's surface area, inviting oxygen to immediately start breaking down those precious compounds. That incredible smell that fills your kitchen when you open a bag of pre-ground coffee? That’s flavor escaping into the air, never to make it into your cup.
The Science of Stale Coffee
It’s shocking how fast it happens. Within just 15 minutes of grinding, coffee can lose up to 60% of its aroma. This is exactly why most pre-ground coffee, no matter how fancy the packaging, often tastes flat and lifeless.
You end up missing out on the bean's true character—the bright citrus notes of an Ethiopian single-origin or the deep, chocolatey richness of a Brazilian roast. Grinding just before you brew preserves those unique characteristics and delivers them right where they belong: in your cup. The difference isn't subtle; it's a night-and-day experience.
The core principle is simple: the aroma you smell in the air is aroma that is no longer in your coffee. By grinding seconds before brewing, you capture that potential in your cup.
Unlocking Peak Flavor Anywhere
This rule holds true everywhere, from your kitchen counter to a chilly campsite. Learning how to grind your own beans is all about taking control of the most critical variable in the entire brewing process. It isn't about being a coffee snob; it's about honoring the journey the beans took to get to you.
Research backs this up, showing that freshly ground beans can release 200-300% more aromatic compounds than their pre-ground counterparts. This is what keeps those distinct flavor notes alive, whether it's the bright acidity of an Ethiopian Guji or the bittersweet punch of a Brazilian Cerrado Mineiro. It’s also why understanding how long ground coffee stays fresh is so critical.
For campers and hikers, a solid manual burr grinder is a game-changer—it's portable, needs no power, and is the key to getting a great extraction from a camp French press. The home grinder market has exploded for a reason, as more people discover this simple truth.
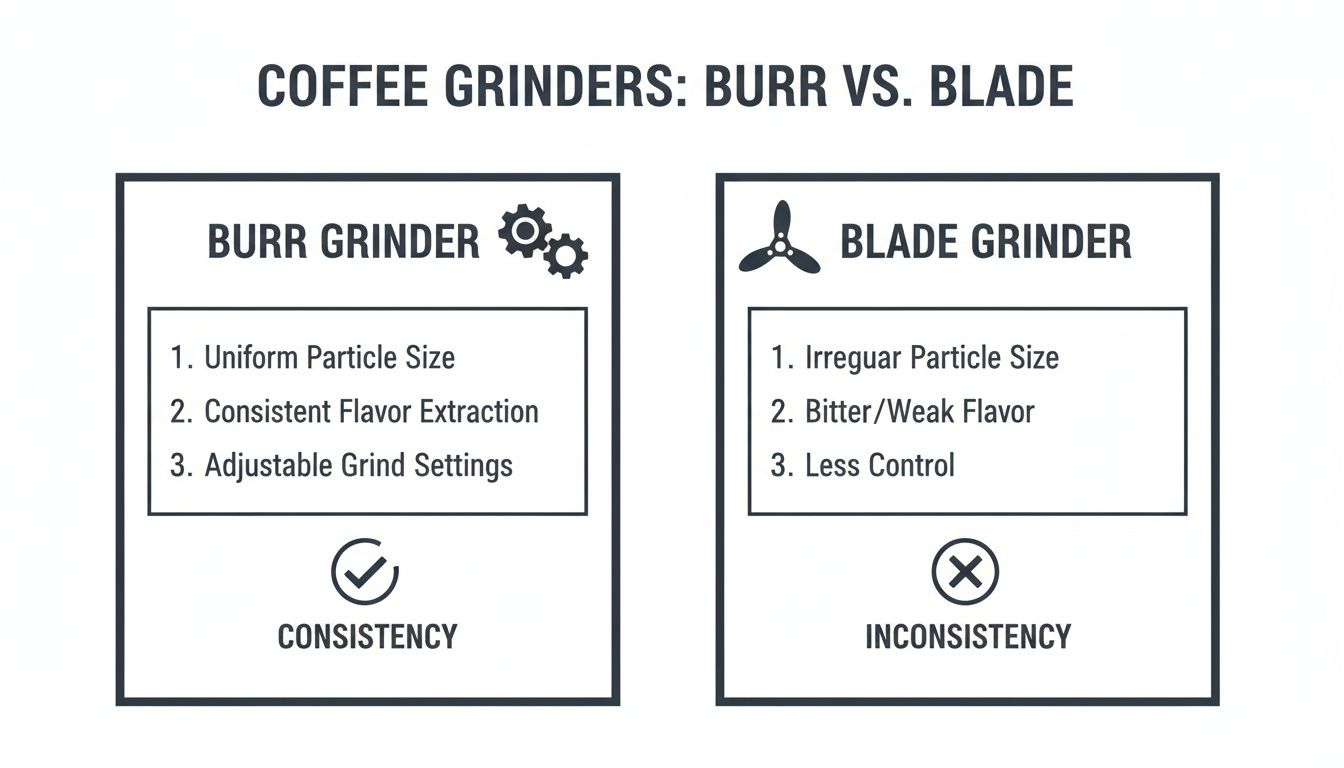
Burr vs. Blade Grinders: Your Most Important Coffee Decision
Your coffee grinder isn't just another kitchen gadget; it's the single most important piece of equipment you'll own for making a better cup of coffee. Seriously. It has more impact than your fancy brewer or gooseneck kettle. The grinder is what unlocks the potential locked inside every single bean.
So, when you're ready to start grinding your own coffee at home, the first big choice you'll face is between a burr grinder and a blade grinder. While both turn whole beans into coffee grounds, how they do it makes all the difference in the world. Getting this right is your first step toward truly controlling your brew.
The Blade Grinder: A Common (But Flawed) Start
Let's be honest, a blade grinder is basically a tiny blender. It has a spinning propeller-like blade that just violently smashes and chops coffee beans into smaller pieces. You can find them everywhere, they're cheap, and for a lot of people, it's their first foray into home grinding.
The problem? It’s a chaotic mess. The chopping action creates a wild mix of particle sizes—from big chunks (we call these boulders) to super-fine dust (fines). This complete lack of uniformity is a recipe for a disappointing cup of coffee.
- Boulders: The big pieces don't get enough contact time with the water. They're under-extracted, which makes your coffee taste sour, weak, and flat.
- Fines: The powdery dust gets too much contact, too fast. They're over-extracted, creating harsh, bitter, and chalky flavors.
The end result is a brew that's somehow both sour and bitter at the same time, completely masking the bean's true character. Sure, it’s a step up from pre-ground, but a blade grinder will always be the weak link in your setup.
The Burr Grinder: The Secret to a Great Cup
Unlike the blade grinder's chaotic chopping, a burr grinder is all about precision. It uses two abrasive surfaces, called burrs, to crush and grind beans between them. One burr stays put while the other spins, and you can adjust the tiny gap between them.
That adjustability is everything. By setting the distance between the burrs, you can produce coffee grounds of a consistent, even size, time after time. This uniform grind leads to a much more even extraction—the water interacts with all the coffee particles in the same way, unlocking a balanced, clean, and incredibly flavorful brew.
For anyone serious about their coffee, burr grinders are the only way to go. They give you precise control over your grind size, which is a massive deal. A small adjustment can change your brew time by 50-100% and completely transform the taste. It's no surprise that blade grinders lead to over-extracted, bitter coffee around 40% more often.
Imagine you've got our medium maple-sweet blend. As a remote worker needing a quick morning fix, you might dial in a fine grind for your espresso pods. But for a weekend hiking trip, you’d set it much coarser for a big batch of cold brew to steep over a couple of days. That’s the kind of control we're talking about. According to one comprehensive market analysis, this level of control is exactly why home brewing enthusiasts are overwhelmingly choosing burr grinders.
Burr Grinder vs Blade Grinder At a Glance
Still weighing your options? This table breaks down the core differences to help you see why burr grinders are the clear winner for flavor.
| Feature | Burr Grinder | Blade Grinder |
|---|---|---|
| Grind Consistency | Uniform and consistent particles | Uneven mix of powder and chunks |
| Flavor Impact | Balanced, clean, and complex | Often bitter and sour simultaneously |
| Control | Precise, adjustable grind settings | Unpredictable, based on time |
| Price | Higher initial investment | Very budget-friendly |
| Best For | Anyone serious about coffee quality | Absolute beginners on a tight budget |
Ultimately, a blade grinder gets the job done, but a burr grinder does it right. The leap in quality is something you can taste immediately.
Types of Burr Grinders
Once you've decided on a burr grinder, you'll find a few more choices to make that will fine-tune your coffee routine.
Conical vs. Flat Burrs
This is all about the shape of the burrs themselves. Conical burrs have a cone-shaped inner burr that spins inside a ring-shaped outer one. Flat burrs are two parallel rings with sharp teeth that face each other. Coffee geeks love to debate the subtle flavor differences between them, but the truth is, both produce excellent, consistent grounds that are worlds better than anything a blade grinder can manage.
Manual vs. Electric Grinders
This choice boils down to your budget, lifestyle, and how much coffee you make.
- Manual (Hand) Grinders: You provide the power. These grinders are less expensive, blissfully quiet, and super portable. They're perfect for travel, camping, or just a peaceful morning ritual at home. A great entry-level option like the Hario Mini-Slim Ceramic Coffee Mill delivers fantastic grind quality in a small package.
- Electric Grinders: These offer speed and convenience with the push of a button. They’re the go-to for daily home use, especially if you're brewing for a crowd or making espresso, which demands an incredibly fine and consistent grind.
Key Takeaway: If you can only upgrade one piece of your coffee setup, make it a burr grinder. The immediate improvement in consistency and flavor will be more noticeable than any other change you can make.
How to Match Grind Size with Your Brewing Method
Alright, you’ve got a great grinder. Now for the fun part. Matching your grind size to your brew method isn't just a technical step—it's where you really start to take control of the flavor in your cup. Think of it like a chef seasoning a dish to perfection; your grinder's dial is how you'll bring out the best in every bean.
So, what’s the big deal with grind size? It all comes down to extraction, which is just the fancy term for water dissolving all the delicious flavor compounds from your coffee grounds. A finer grind means more surface area, leading to a quick, intense extraction. Go coarser, and you have less surface area, which means you'll need more time with the water to pull out those same flavors.
Nailing this balance is the secret to dodging a cup that’s either disappointingly sour (that's under-extraction) or unpleasantly bitter (hello, over-extraction).
The Core Principle: Why Grind Size Matters So Much
Every brew method has its own unique relationship with time. Immersion brewers, like a French Press, let the grounds steep for several minutes. An espresso machine, on the other hand, blasts hot water through a tightly packed puck of coffee in less than 30 seconds. Each one demands a completely different grind to get a balanced flavor in its specific timeframe.
Just imagine using a coarse French Press grind in an espresso machine. It would be a disaster. The water would gush right through, barely grabbing any flavor, leaving you with a weak, sour shot.
Flip that around and use a fine espresso grind in a French Press? You'd end up with a muddy, bitter mess that’s nearly impossible to plunge.
This is exactly why a good burr grinder is so crucial. It gives you the consistent particle size you need for each specific brew method, unlike a blade grinder which just creates a chaotic mix of dust and boulders.
As you can see, the uniform particles from a burr grinder lead to an even, balanced extraction. The inconsistent chop from a blade grinder? That just gets you a cup that's somehow both sour and bitter at the same time.
Dialing It In: A Practical Guide
"Dialing in" is coffee-speak for tweaking your grind setting to find the sweet spot for a particular coffee and brewer. My personal rule of thumb is to grind as fine as you can before the coffee tastes bitter, then back it off just a notch or two. This pushes the extraction right to the edge, pulling out all the sweetness and complexity without going too far.
Let’s break it down by brewer.
For Immersion Brewing: French Press & Cold Brew
When you're fully submerging coffee grounds for a long time, you need to go coarse.
- French Press: You're looking for a grind that resembles coarse sea salt. The long steep time—usually 4 minutes—needs a coarse grind to keep from over-extracting. Too fine, and you’ll get a sludgy, bitter brew that’s a nightmare to plunge. We’ve got more tips in our complete guide on how to make French Press coffee.
- Cold Brew: Go for the coarsest setting on your grinder. Think chunky breadcrumbs. Since cold brew steeps for 12-24 hours, a really large particle size is key for a slow, gentle extraction that gives you that signature smooth, low-acid concentrate without any bitterness.
For Drip & Pour-Over Coffee
This is medium-grind territory. The idea is to let water flow through the coffee bed at a steady pace, usually wrapping up between 2 to 4 minutes.
- Automatic Drip Machines: Start with a solid medium grind, about the texture of regular sand. If your coffee tastes weak, grind a little finer. If it's coming out bitter, go a bit coarser.
- Pour-Over (V60, Kalita Wave): This is where precision really pays off. Start with a medium-fine grind, a little finer than sand. If your V60 brew finishes in under 2 minutes, you’re probably under-extracting and should go finer. If it’s dragging on past 4 minutes, it’s likely over-extracted, so go coarser.
- Chemex: The Chemex has a much thicker paper filter, so it prefers a slightly coarser grind—more of a medium-coarse. This helps keep the brew from stalling out and turning bitter.
For Pressure & Hybrid Methods
These brewers use pressure to speed things up, so they need a finer grind.
- AeroPress: This little brewer is famous for its versatility. For the standard method, a fine grind similar to table salt is perfect for a quick 1-2 minute brew. But if you’re using an inverted recipe with a longer steep time, you can play around with medium grinds.
- Moka Pot: You need a fine grind here, just a touch coarser than you’d use for espresso. It should feel like fine sugar. If you grind too fine, you risk choking the Moka Pot, which can block water flow and create a dangerous pressure situation.
- Espresso: This is the finest of them all. You need an incredibly fine and uniform grind, almost like powdered sugar. This creates enough resistance for the machine's 9 bars of pressure to produce a balanced shot in 25-30 seconds. A high-quality burr grinder isn't just recommended here; it's essential.
To make things even easier, here's a quick reference chart you can bookmark for your home brewing adventures.
Coffee Grind Size Quick Reference Chart
| Brew Method | Grind Size | Looks Like | Brewing Tip |
|---|---|---|---|
| French Press | Extra Coarse | Cracked Peppercorns | Plunge slowly and evenly to avoid kicking up fine particles into your cup. |
| Cold Brew | Coarse | Coarse Sea Salt | Use a 1:8 coffee-to-water ratio and steep for 18-24 hours for a rich concentrate. |
| Chemex | Medium-Coarse | Rough Sand | The thick filter requires a coarser grind to allow proper water flow. |
| Drip Coffee Maker | Medium | Regular Sand | Adjust grind to taste; finer for more strength, coarser to reduce bitterness. |
| Pour-Over (V60) | Medium-Fine | Table Salt | Aim for a total brew time of 2:30-3:30. Adjust grind to hit this window. |
| AeroPress | Fine to Medium | Fine Sand | Highly versatile; use a finer grind for short brews, coarser for longer ones. |
| Espresso | Extra Fine | Powdered Sugar | This requires a high-quality burr grinder for precise, micro-adjustments. |
With this guide in hand, you’re ready to stop guessing and start dialing in the perfect grind for any coffee and any brewer. Happy grinding
Your Daily Grinding Ritual at Home or on the Trail
Once you've got the right grinder and a feel for grind size, it's time to build a simple, repeatable ritual. This is where all that knowledge gets put into practice, turning what could be a chore into a deeply satisfying part of your morning—whether you're standing in your kitchen or waking up trailside.
Consistency is everything in coffee. And it all starts with how you measure your beans. A truly delicious cup isn't about guesswork; it’s about starting with the right ingredients in the right amounts, every single time.
Measuring Your Beans The Right Way
For pinpoint accuracy, nothing beats a digital kitchen scale. Measuring by weight, not volume, is the secret because different beans have different densities and sizes. A scoop of a light-roasted Ethiopian bean might weigh a lot less than the same scoop of a dense, dark-roasted bean from Brazil.
Using a scale completely eliminates that variable. It guarantees you're using the exact same amount of coffee for every brew, which is the foundational step for getting repeatable, delicious results.
A fantastic starting point is the golden ratio of coffee to water. The sweet spot is generally between 1:15 and 1:18—that’s one part coffee to 15-18 parts water, all measured by weight. A common and easy-to-remember ratio is 1:16.
- For a standard 12-ounce mug (that’s about 340 grams of water), you’d start with around 21 grams of coffee beans.
- For a larger 32-ounce French press (about 900 grams of water), you'll want roughly 56 grams of coffee.
But what if you don't have a scale, especially when you're out on the trail? A standard coffee scoop is your next best friend. It’s less precise, sure, but it's fast and convenient. Just know that one level scoop typically holds around 7-10 grams of whole beans. Find an amount that tastes good to you and just stick with it.
The Grinding Process, Dialed In
With your beans measured, the actual grinding is straightforward. The most important rule is to only grind what you need, right before you brew. That's non-negotiable for fresh flavor.
For an electric grinder, just pour your measured beans into the hopper, dial in your setting, and hit the button. Here's a pro tip to cut down on static and mess: the Ross Droplet Technique (RDT). Just lightly spritz your beans with a single drop of water and give them a quick shake before grinding. This tiny bit of moisture works wonders to eliminate static cling.
With a manual grinder, the process is more hands-on but every bit as effective. Pour in your beans, attach the handle, and start cranking with a steady, even pace. It’s a wonderfully quiet and almost meditative way to start your day, especially when you're outdoors.
Don't ever be afraid to tweak your grind setting. If your coffee tastes weak or sour, go a notch finer. If it's harsh and bitter, dial it back a little coarser. Your taste buds are the ultimate guide.
Taking Your Grinding Routine on the Road
Your coffee ritual doesn't have to stop just because you've hit the trail. With a tiny bit of prep, you can enjoy an incredible cup of coffee literally anywhere.
The best tool for the job is a durable manual burr grinder. It’s lightweight, easy to pack, and needs no electricity, making it an essential piece of any camp kitchen.
Before you head out, pre-dose your beans for each day of your trip. Use small, reusable bags or containers to portion out the exact amount you’ll need for your morning brew. This saves you from lugging a scale along and makes your camp morning routine dead simple.
When it's time to brew, the process is the same as at home—just with a much better view. Pour your pre-dosed beans into your hand grinder and get to work. The simple act of grinding fresh beans as the sun rises over a mountain is one of camping's great pleasures, connecting you directly to the process and making that first cup taste even better.
Keeping Your Grinder Clean for Better Tasting Coffee
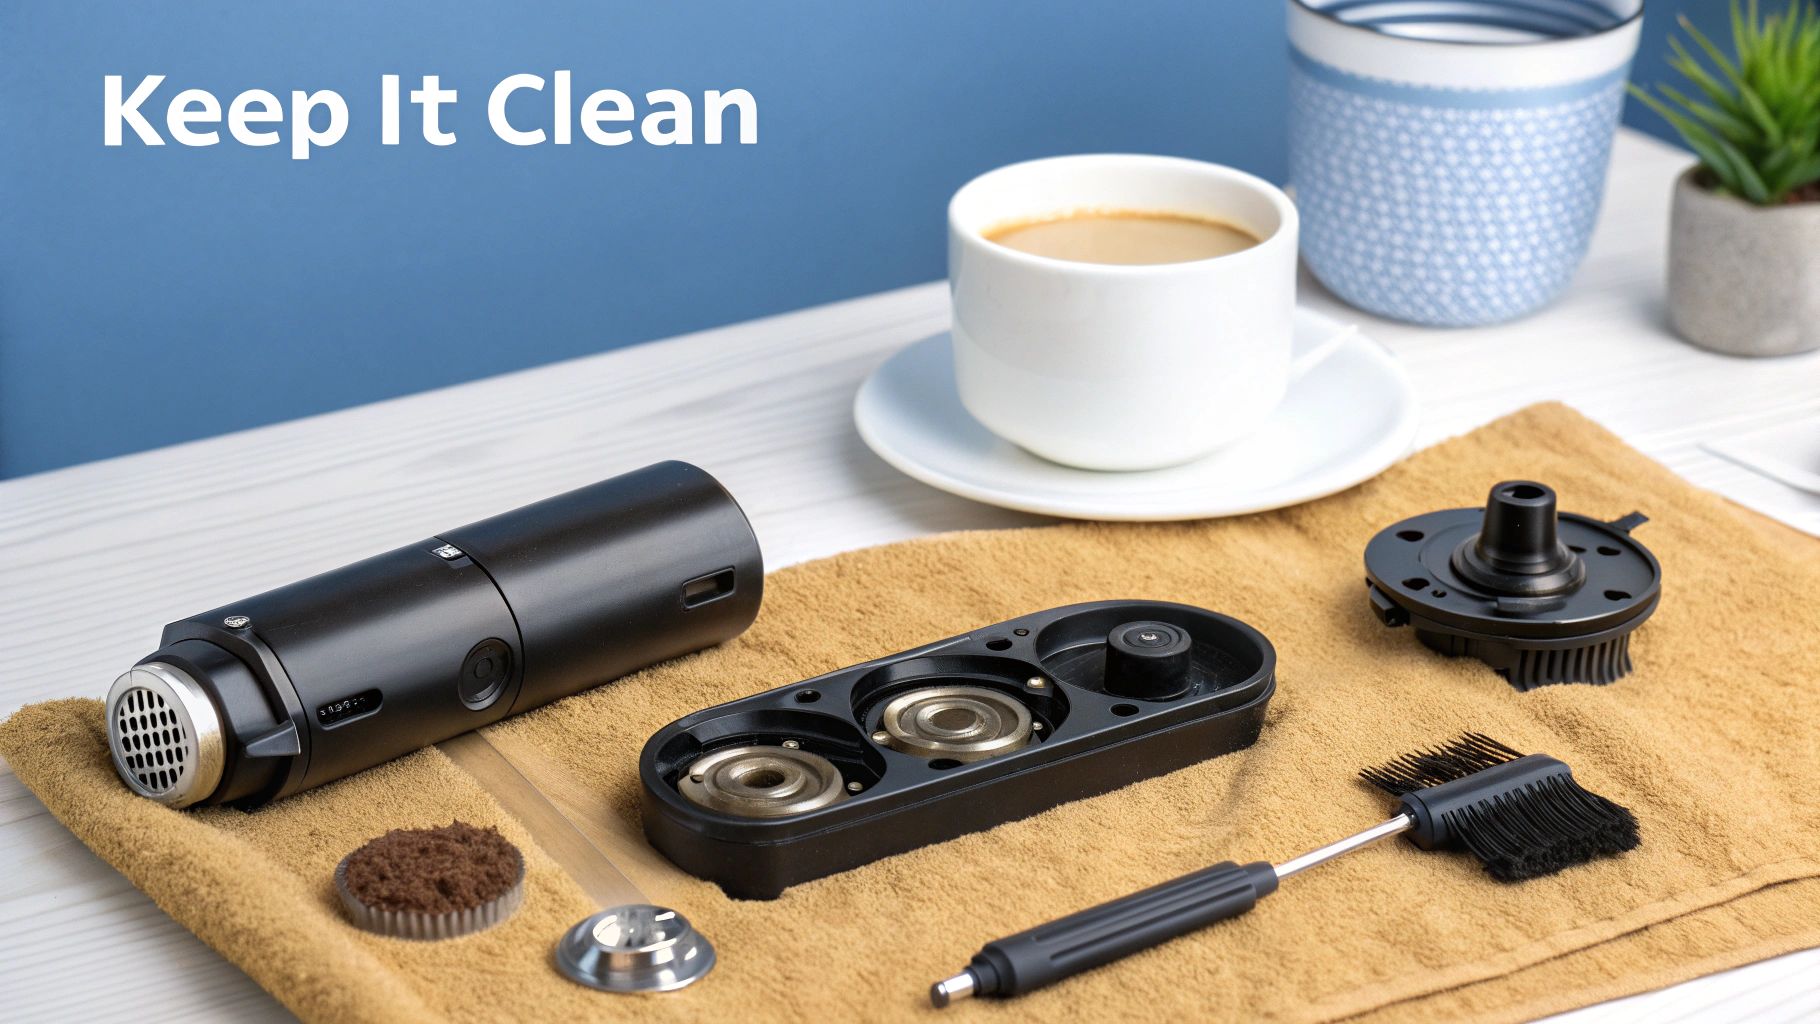
A great burr grinder is a serious investment in flavor, but even the best gear needs a little TLC. Over time, coffee oils and microscopic grounds—what we call fines—build up inside. Those old residues eventually go rancid, and you'll start tasting stale, bitter notes in your fresh coffee.
Regular maintenance isn't some big chore. It’s just a simple habit that protects your grinder and makes sure every single cup tastes as fresh and vibrant as it should. Think of it as hitting the reset button on your coffee's flavor potential.
Quick Daily and Weekly Cleaning
The best way to tackle grinder maintenance is little and often. A few seconds of care after each use can stop major buildup before it starts, keeping your daily brew tasting clean and crisp.
After Each Grind:
- Brush it out: Grab a small, stiff-bristled brush and give the exit chute and collection bin a quick sweep.
- Use a Bellows: If your grinder has a silicone bellows on the lid, give it a few firm pumps. This forces air through the grind chamber and dislodges any stubborn grounds hiding in there.
This whole routine takes less than 30 seconds but honestly makes a world of difference. For a weekly touch-up, just unplug the grinder, take off the hopper and grounds bin, and give them a more thorough brushing to clear out anything clinging on.
Whatever you do, never use water to clean the burrs or the internal grinding chamber. Moisture is the fastest way to cause rust and completely wreck the delicate mechanics of your grinder.
Time for a Deep Clean
Every few weeks—or definitely when you switch to a new type of coffee bean—it’s time for a deeper clean. This is how you get rid of the stubborn oils and fines that a simple brushing just can't reach. It sounds more intense than it is.
First, unplug your grinder and remove the bean hopper. Run it for a few seconds to flush out any whole beans still hanging around inside. Next, carefully take out the upper burr carrier (check your grinder’s manual for how to do this). This will expose the burrs and the grinding chamber.
Now, use your brush and a vacuum with a hose attachment to get in there and thoroughly clean out all the old grounds from the chamber, the burrs, and the chute.
This deep clean resets your grinder to a neutral state, so you don't get flavor contamination from old beans. It's especially key with burr grinders, which are designed to keep temperatures below 140°F to avoid the 25% flavor degradation that heat can cause. Proper cleaning ensures nothing messes with that process, especially since pre-ground bags can lose up to 60% of their aroma within 24 hours. If you're curious about how the market is changing, check out these industry insights on home coffee grinding.
Common Questions About Grinding Coffee at Home
As you get deeper into the rewarding world of grinding your own coffee, a few questions always seem to pop up. These are the little details and troubleshooting moments everyone runs into. We’ve gathered the most common ones here to give you quick, clear answers and help you brew with more confidence.
Think of this as your go-to guide for those small but significant questions that make all the difference in your daily coffee ritual.
How Long Do Whole Coffee Beans Actually Stay Fresh?
Whole coffee beans are at their absolute best for about two to four weeks after their roast date. After that, they’re still perfectly fine to use for a few months, but you'll notice the complex, vibrant aromas and nuanced flavors starting to fade. The clock is always ticking.
Proper storage is everything. Keep your beans in an airtight, opaque container in a cool, dark spot like a pantry—and please, never in the freezer. This is exactly why buying freshly roasted beans in smaller, more frequent batches is such a game-changer for taste.
What Can I Use If I Don't Have a Coffee Grinder?
When you’re in a real pinch, you can get creative, but just know that consistency is going to be a huge challenge. Think of these as emergency solutions, not long-term strategies for a great cup.
A few makeshift methods:
- A Blender: Use the 'pulse' setting in very short, sharp bursts. It’s essentially a chaotic blade grinder that can easily heat the beans if you're not careful.
- A Mortar and Pestle: This classic tool works if you have plenty of patience and are aiming for a coarse grind. It's a lot of work for uneven results, though.
- The Bag and Hammer Method: If you're outdoors or truly desperate, put your beans in a tough, sealed bag and gently crush them with a heavy, flat object like a rolling pin or the bottom of a pan.
These methods will get you caffeinated, sure. But even a simple manual grinder is a small investment that pays off big time in flavor.
Why Does My Grinder Create So Much Static?
Ah, static. It’s a common and incredibly annoying issue, especially with electric burr grinders in dry climates. It’s the reason fine coffee grounds and chaff cling to everything, making a real mess.
The best fix is a remarkably simple trick called the Ross Droplet Technique (RDT). Just before grinding, add a single drop of water to your beans. A tiny spritz from a small spray bottle is even better. Give them a quick shake, then grind as you normally would.
That tiny bit of moisture is just enough to neutralize the static electricity without causing any harm to your grinder’s burrs. It’s a simple, effective solution that tons of coffee pros use every day.
Is It Okay to Grind My Coffee for the Whole Week?
While grinding a batch for the week is definitely a step up from buying pre-ground coffee, you're still making a big compromise on flavor. Remember, ground coffee starts losing its most volatile—and delicious—aromatic compounds just minutes after grinding. Oxygen is the enemy of freshness, and grinding creates a massive surface area for it to attack.
For the absolute best flavor and aroma, the golden rule is simple: grind only what you need, right before you brew. The difference between coffee ground five minutes ago versus five days ago is something you can genuinely taste and smell. Grinding fresh for each cup ensures you capture all the potential the roaster worked so hard to create.
At Lost Without Coffee Co., we believe that great coffee should be accessible anywhere, from your kitchen counter to your campsite. Our small-batch, ethically sourced beans are roasted to bring out the best in every cup.
Explore our collection of fresh-roasted coffee beans and start your adventure today.