
How to Use Grinds Coffee Pouches for Perfect Outdoor Coffee
Grinds coffee pouches are your ultimate hack for a great cup of coffee, anywhere. Think of them like a tea bag for coffee—you can steep the whole pouch in hot water. Or, you can tear it open and use the pre-measured grounds for a pour-over or immersion brew. It’s a perfect serving every time, with no grinder, no scale, and no mess.
Your Essential Guide to Coffee Pouches On The Go
Welcome to the simplest way to get fantastic coffee, no matter where your day takes you. Grinds coffee pouches are a secret weapon for adventurers, campers, and anyone who wants fresh, flavorful coffee without a bunch of gear.
This guide is built for real-world use. We’re skipping the jargon and getting straight to practical, easy-to-follow instructions. You’ll see exactly how to turn one of these little pouches into a perfect cup, whether on a mountain trail or at your desk.
It’s no surprise this convenience is catching on. The global market for single-serve coffee products is projected to hit $1,674.5 million by 2035. This growth is driven by people like us who need easy, portable options that don't compromise on quality.
Quick Guide to Grinds Pouch Brewing Methods
Here’s a quick-reference chart comparing the most common ways to brew with a grinds pouch. It breaks down the gear, time, and best-case scenario for each, helping you pick the right method in a snap.
| Brewing Method | Gear Needed | Brew Time | Best For |
|---|---|---|---|
| Simple Steep | Mug, Hot Water | 4-5 Minutes | The fastest and easiest method; great for offices or minimal gear camping. |
| Pour-Over/Drip | Mug, Cone Filter | 3-4 Minutes | Achieving a clean, classic drip coffee flavor with more control. |
| Mug Immersion | Mug, Hot Water, Spoon | 4-6 Minutes | A full-bodied, French Press-style brew without the extra equipment. |
| Cold Brew | Jar/Bottle, Cold Water | 12-24 Hours | Smooth, low-acidity coffee that's perfect for making ahead of time. |
The best part is that each of these methods pulls a unique taste profile from the very same pouch. Your choice comes down to the gear you have and the coffee you're in the mood for.
If you're curious about diving deeper into what makes each style unique, you might be interested in exploring more about the nuances of single cup coffee brewing in our detailed guide.
Mastering Hot Brewing Methods Anywhere You Roam
Ready for a hot, aromatic cup of coffee, even when you're far from your kitchen? Grinds coffee pouches make it incredibly simple. Let's break down three of the most popular ways to brew a hot cup.
The beauty of these pouches is their versatility. People value simplicity, and it shows—the global market for coffee pouch packaging is set to hit $1,200 million. These aren't just convenient containers; they're your ticket to a perfect portable brew.
Our single-serve pouches hold about 7-10 grams, which is just right for a standard mug. With 7,500 million units circulating globally each year and 28% of that volume right here in North America, they're perfectly suited for the U.S. coffee lover. You can find out more about the growth of coffee pouch packaging trends on marketreportanalytics.com.
This simple graphic shows just how straightforward it is.
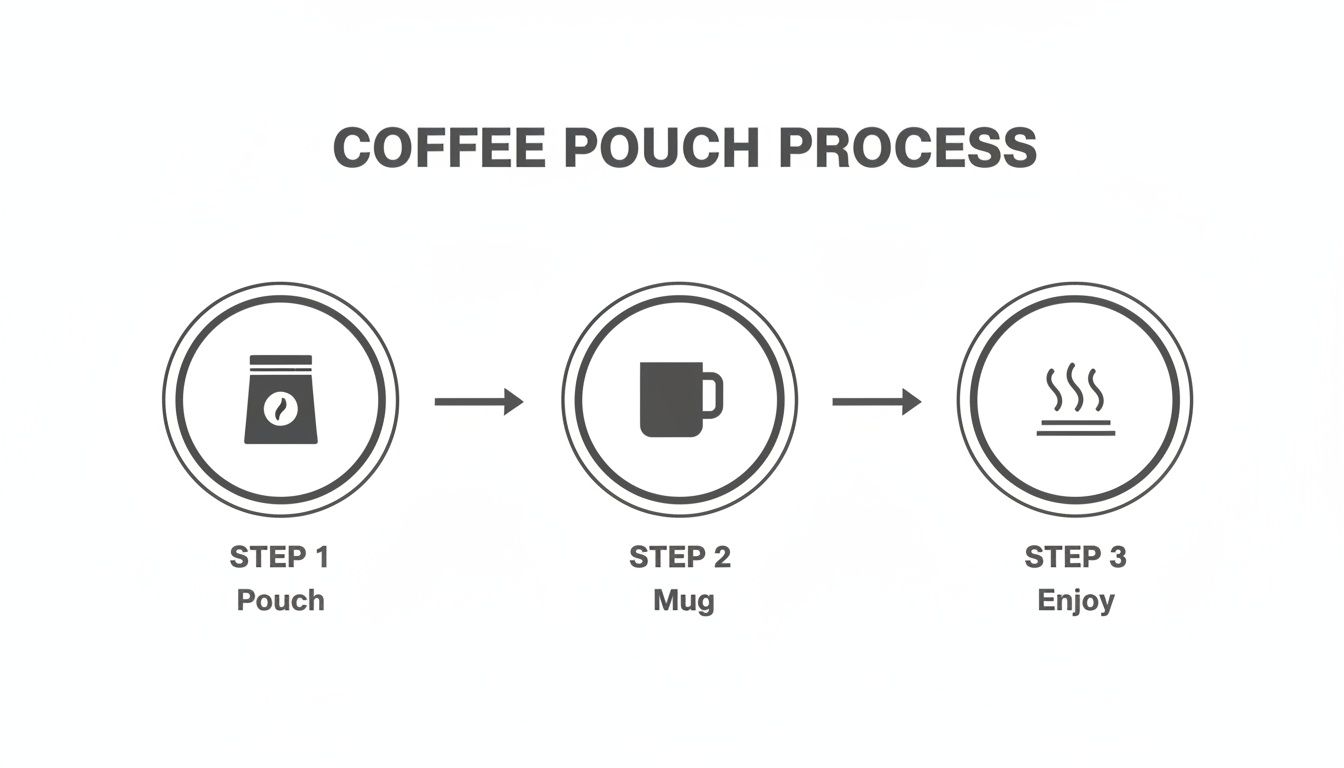
As you can see, the core idea is always the same: grab your pouch, prepare your mug or brewer, and enjoy.
Simple Mug Immersion
This is the most direct way to get your coffee fix. Just tear open a pouch, pour the grounds into your favorite mug, add hot water, and let it steep. It’s a French Press experience without the press. Water temperature is key. Aim for just off the boil to avoid a bitter taste.
| Roast Profile | Ideal Water Temperature |
|---|---|
| Light Roast | 200-205°F (93-96°C) |
| Medium Roast | 195-200°F (90-93°C) |
| Dark Roast | 190-195°F (88-90°C) |
After adding water, give it a gentle stir and let it sit. How long you steep comes down to personal preference.
- For a milder brew: 3-4 minutes is plenty.
- For standard strength: Let it go for 4-5 minutes.
- For a bold, strong cup: Steep for 5-6 minutes.
The grounds will settle at the bottom. You can either drink carefully or strain the last bit if you have a small filter on hand.
The Pour-Over Technique
If you prefer the clean, bright flavor of drip coffee, the pour-over method is perfect. All you need is a simple cone filter holder that sits on your mug. This technique gives you more control over the final taste.
How to Make a Pour-Over
- Prep Filter: Place a paper filter in your pour-over cone.
- Add Grounds: Tear open your pouch and pour the coffee evenly into the filter.
- Bloom: Pour just enough hot water (about twice the weight of the grounds) to wet them. Wait 30 seconds. This step releases trapped gases and kickstarts flavor extraction.
- Finish Pour: Slowly pour the rest of your hot water in a circular motion, saturating all the grounds.
This method really brings out the nuanced flavors of single-origin beans, like the bright notes in our Ethiopian Guji or the balanced sweetness of our Guatemalan Antigua roast.
Portable French Press Perfection
Traveling with a small French press? Our coffee pouches take all the guesswork out of dosing for a consistently rich and full-bodied cup. Just empty one or two pouches into the press, add hot water, and let it steep for about four minutes. Slowly press the plunger down, and you're ready to pour. It's a fantastic way to enjoy a classic brew on the go.
For more ideas on getting the most from your outdoor setup, check out our guide on brewing coffee while camping.
Unlocking Cold Brew and Iced Coffee Potential
Hot coffee isn’t the only way to get a fantastic brew from a grinds pouch. When the weather heats up, or you crave something smooth, you can easily whip up refreshing cold brew or iced coffee—even on the trail with next to no gear.
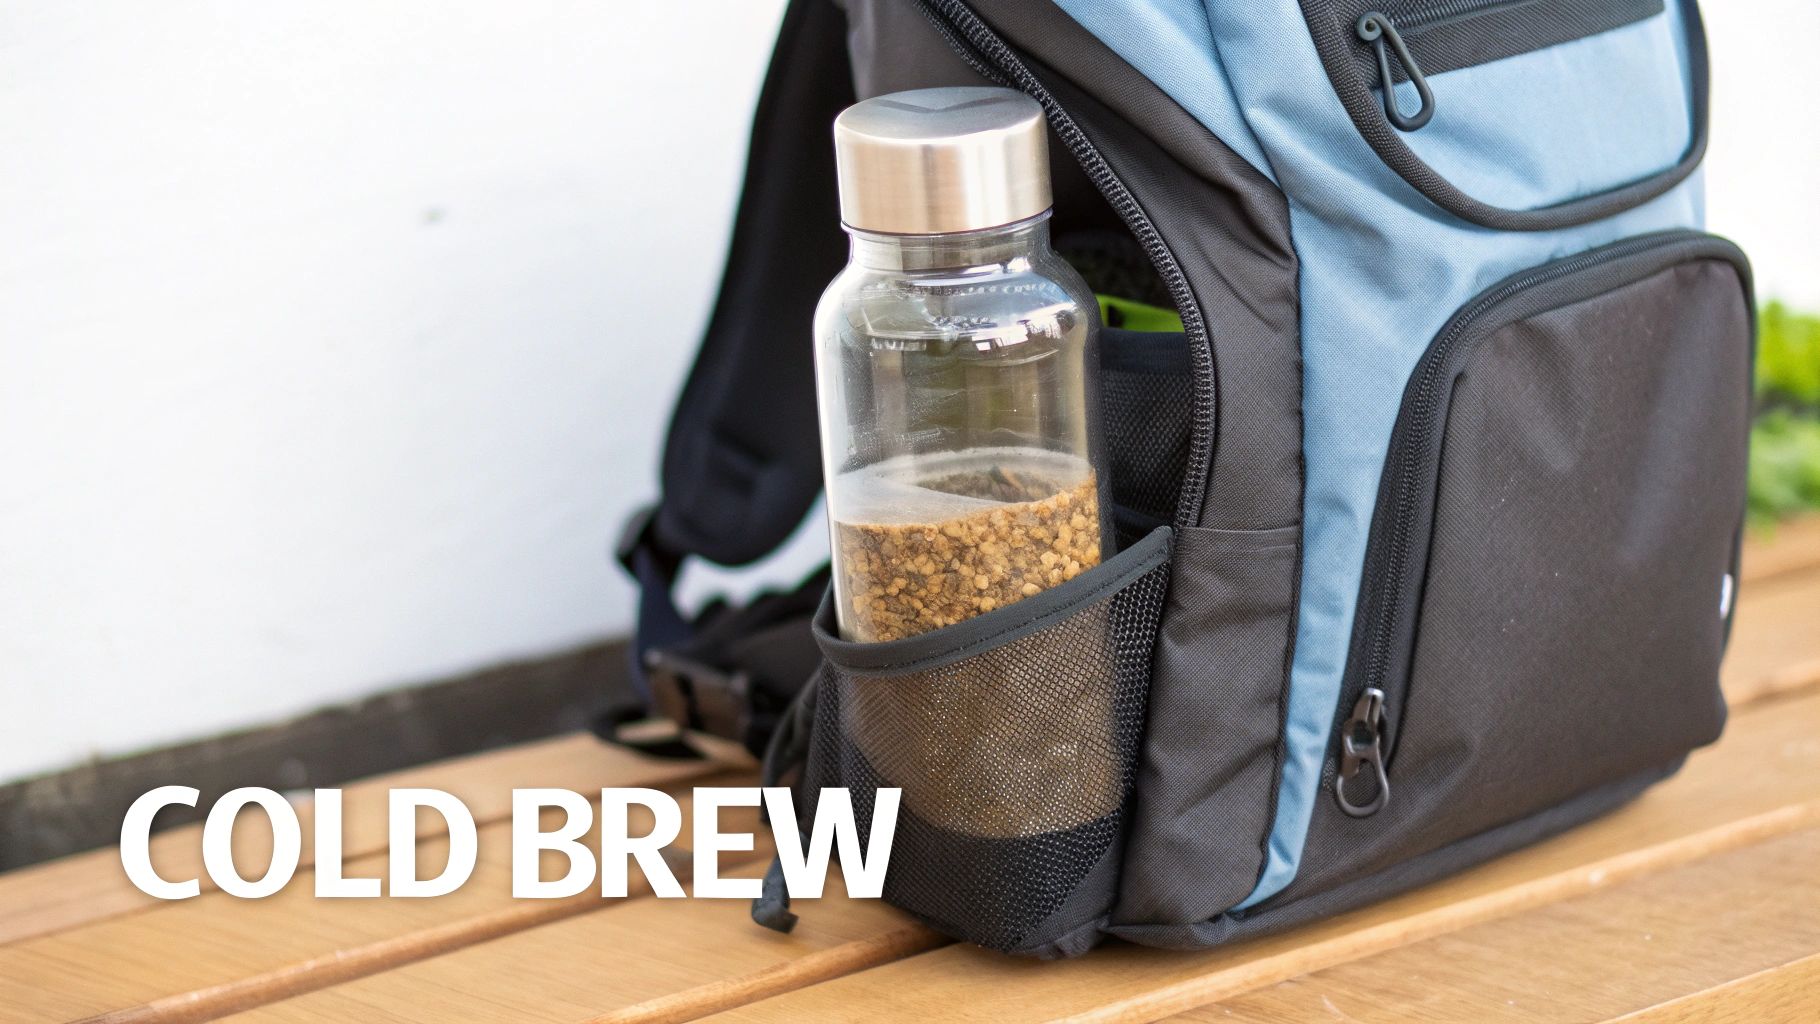
The secret is simple immersion. Letting grounds steep in cold water over a long period extracts flavor without the high acidity and bitterness of hot brewing. The result is a naturally sweet, mellow, and highly concentrated coffee.
Simple Cold Brew Immersion
This is the perfect set-it-and-forget-it method. All you need is a water bottle or a jar with a tight lid. Just toss one or two pouches into your container, top it off with cold, filtered water, and let it do its thing. Use this guide as a starting point to find what you like best.
| Desired Strength | Coffee Pouches (10g each) | Water Volume | Steep Time | Result |
|---|---|---|---|---|
| Standard Brew | 1 Pouch | 8-10 oz | 12-16 Hours | A smooth, ready-to-drink cold brew. |
| Strong Concentrate | 2 Pouches | 10-12 oz | 18-24 Hours | A potent concentrate perfect for diluting with water or milk. |
The convenience is huge, and it’s a big reason single-serve options are blowing up. You can make cold brew on the trail by dropping a pouch in a 16 oz bottle and letting it steep in your pack. In North America, where coffee pouches hold a 28% volume share of the market, 62% of remote workers and outdoor lovers prefer this simplicity. As global demand grows, single-serve solutions are seeing a 15-20% bump. Dig into more stats about the coffee pouch market on datainsightsmarket.com.
Flash Chill Iced Coffee
Need a caffeine fix now? The 'flash chill' technique gets you a crisp iced coffee in minutes. The idea is to brew a strong, hot concentrate and pour it directly over ice, which chills it instantly while providing the perfect amount of dilution.
How to Flash Chill
- Brew Concentrate: Use one pouch with only 4-5 ounces of hot water. Steep for 5-6 minutes for a potent extraction.
- Prep Glass: Fill a large glass or tumbler to the top with ice.
- Pour & Go: Pour the hot coffee concentrate right over the ice.
Recipe Idea: Trailside Vanilla Iced Latte Want to get a little fancy? Pack a small container of vanilla-flavored protein powder or sweetened creamer powder. After you've flash-chilled your iced coffee, stir in a scoop for an instant, creamy latte.
Getting the Details Right: Pro Tips for the Perfect Pouch Brew
Knowing the basics is one thing, but nailing that perfect cup comes down to the details. These are the small adjustments that separate a good cup of coffee from a great one, gathered from seasoned backpackers, campers, and our own roasting team. It all starts with the most fundamental ingredient: water.
Good Water Makes Good Coffee
The water you use makes a massive difference. At home, use filtered water to get rid of chlorine and other off-flavors. On the trail, spring water is your best friend. It’s naturally filtered and doesn't have the chemical taste of treated campground spigots. Avoid "hard" water with a lot of minerals, which can make your brew taste flat.
That Temperature Sweet Spot
Water temperature is critical for getting the extraction just right. Too hot, and you'll scorch the grounds, creating a bitter cup. Too cool, and you'll under-extract, resulting in weak, sour coffee.
| Water Temperature | What's Happening | How It Tastes |
|---|---|---|
| 205°F+ (Boiling) | Over-extraction | Harsh, bitter, and burnt. This pulls out all the wrong compounds. |
| 195-205°F (Ideal) | Balanced Extraction | This is the sweet spot. It properly dissolves the coffee's sugars and aromatic oils for a rich, full flavor. |
| Below 190°F (Too Cool) | Under-extraction | Weak, sour, and undeveloped. The water isn't hot enough to pull out the good stuff. |
No thermometer? No problem. Bring water to a boil, then take it off the heat and let it sit for 30-45 seconds before you pour. That pause usually lands you in the ideal brewing range.
Don't Skip the Bloom
You don't need fancy gear to "bloom" your coffee, and you shouldn't skip it. The bloom is the first bit of hot water you pour over the grounds. Let it sit for about 30 seconds before adding the rest. You’ll see the grounds bubble up—that’s trapped carbon dioxide gas escaping.
Letting these gases escape first is key. It allows the water to make better contact with the coffee grounds for the rest of the steep, giving you a much more even extraction and a more vibrant, aromatic cup.
Clever Campsite Coffee Hacks
Sometimes, you have to get creative in the wild. Here are a few field-tested tricks for making the most of your how to use grinds coffee pouches experience:
- Makeshift Filter: A clean bandana or muslin can work as a filter for pour-over or for straining grounds.
- Insulate Your Mug: On a frosty morning, wrap your mug in a spare wool sock to keep it warmer for longer.
- Repurpose Used Grounds: Used grounds are great for scrubbing a dirty pot or deterring insects. Just remember to pack them out when you leave.
Smart Packing and Sustainable Pouch Use
The last thing you want on the trail is a crushed, damp coffee pouch. Getting your packing system dialed in is key to making sure your coffee tastes great miles from anywhere. It’s all about keeping things simple, dry, and protected.
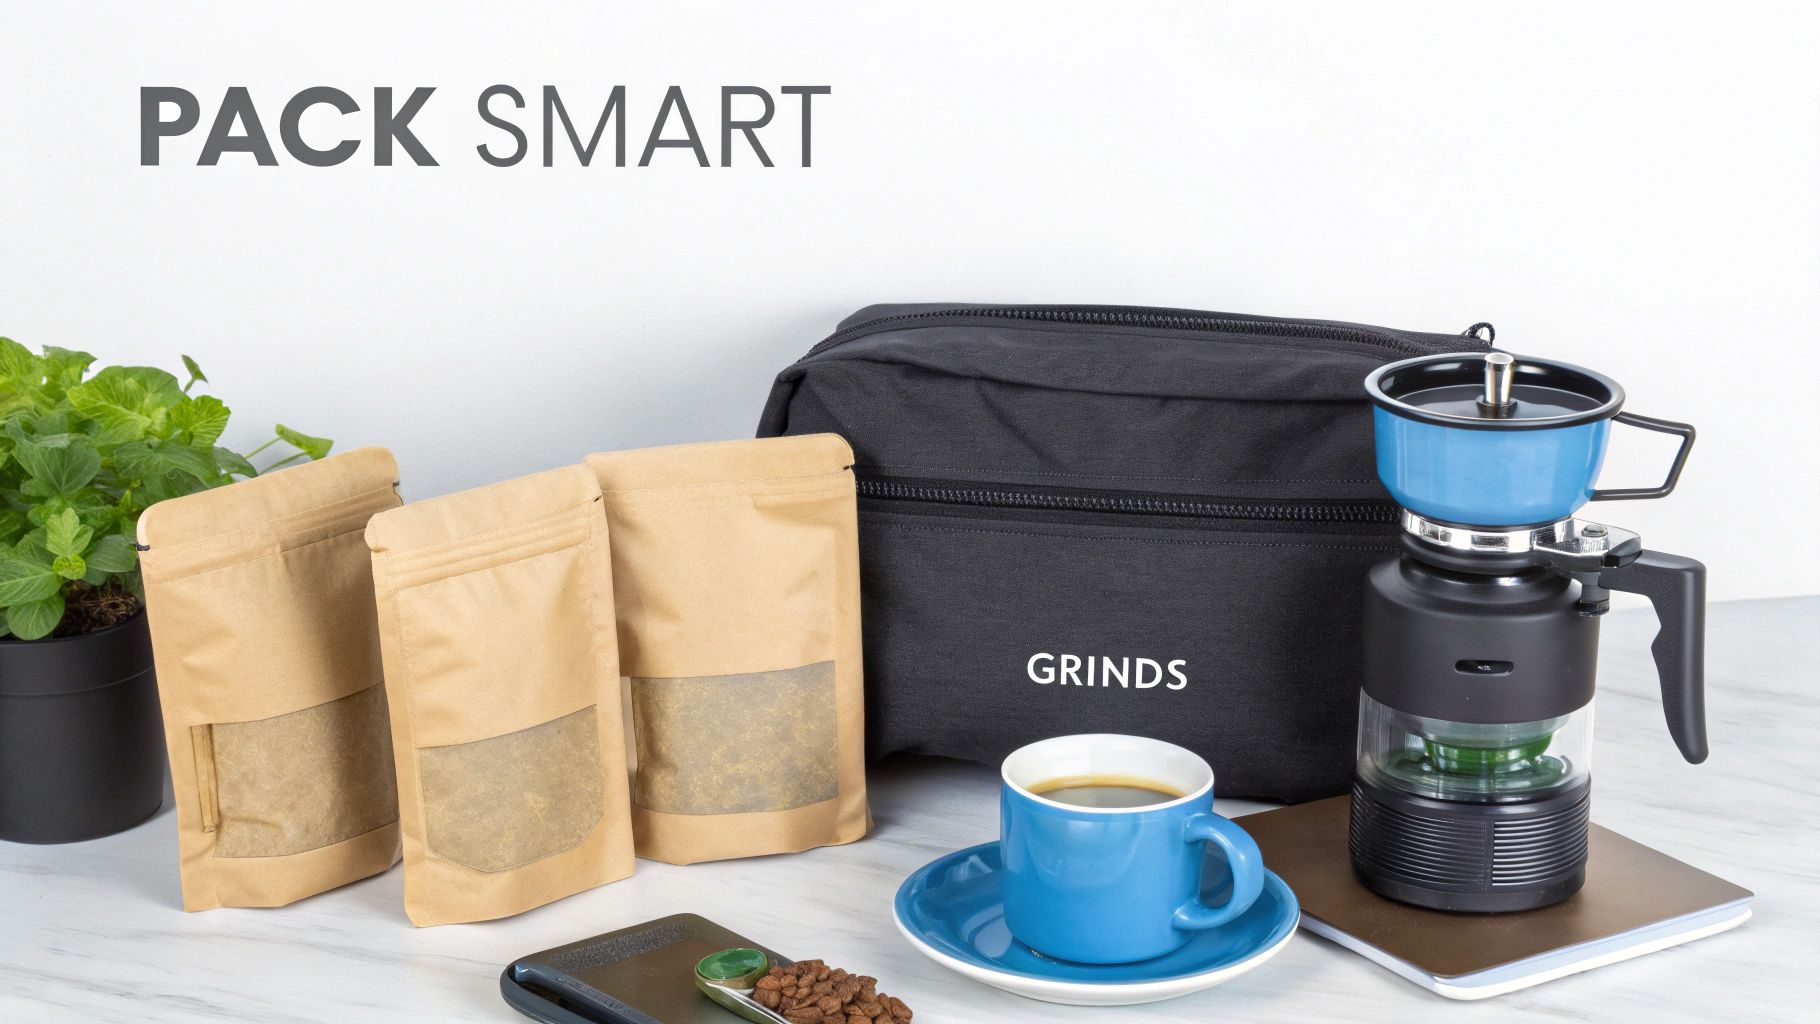
Think of it like building your own grab-and-go coffee station. A small, waterproof stuff sack or a sturdy Ziploc-style bag can be a lifesaver, protecting your pouches from rain, dew, or a leaky water bottle.
Creating Your Compact Coffee Kit
The name of the game is efficiency. You want a lightweight, organized setup with everything you need and nothing you don’t. A well-organized kit makes that first-light coffee ritual smooth and effortless.
| Item | Packing Tip | Why It's Essential |
|---|---|---|
| Grinds Pouches | A small, hard-sided container is ideal to prevent crushing. | Protects from moisture and keeps them from getting flattened in your pack. |
| Lightweight Mug | Go for something insulated and durable that won’t break. | A good mug keeps your coffee hot and stands up to the rigors of the outdoors. |
| Heat Source | A tiny camp stove and a small fuel canister are perfect. | You need a reliable way to get water boiling, fast. |
| Water Bottle | Bring a separate bottle just for clean brewing water. | Good water is the foundation of good coffee. Don’t compromise here. |
| Small Lighter/Ferro Rod | Keep it somewhere dry, like a small waterproof bag. | No fire, no hot coffee. It’s a non-negotiable. |
Sustainable Pouch Use and Leave No Trace
Part of enjoying the great outdoors is leaving it as we found it. Coffee pouches are convenient, but that convenience comes with the responsibility of packing out your trash.
The rule is simple: pack it in, pack it out. Never scatter used coffee grounds on the trail. Even though they’re biodegradable, they can attract wildlife and mess with the local ecosystem. Our guide on the best coffee for camping has more great tips.
A Quick Guide to Responsible Disposal:
- Cool It Down: Let the used pouch cool completely after you’re done brewing.
- Bag It Up: Stick the used pouch into a designated waste bag. A small, sealable plastic bag works perfectly for this.
- Pack It Out: Carry that little bag with you until you find a proper trash can at a trailhead or back in town.
This routine is a small effort that makes a massive difference in preserving our wild spaces.
Common Questions About Grinds Coffee Pouches
Even the simplest things can bring up good questions. We get asked a lot about the best ways to brew, so we've gathered the most common queries right here.
How Many Pouches Do I Need For A Stronger Cup?
Our pouches are measured for a solid 8 to 10-ounce cup. If you prefer a stronger brew, making it is simple.
- Easiest Way: Use two pouches in the same amount of water. This doubles your coffee-to-water ratio for a bolder cup.
- Other Tweaks: Use less water (e.g., 6 ounces) with one pouch or steep it for an extra minute or two.
It comes down to experimentation. Play around with these variables, and you'll quickly find the strength that’s perfect for you.
Can I Use Grinds Coffee Pouches In An Espresso Machine?
The short answer is no. Our pouches contain a medium-coarse grind, ideal for drip, pour-over, and immersion. Espresso requires a very fine grind and intense pressure. Using our grounds would result in a weak, watery, and under-extracted shot. Stick to the brewing methods in this guide for the best results.
Are The Individual Pouches Resealable?
Each pouch is sealed for a single, perfect brew to lock in freshness. Once you tear it open, it’s go-time—the pouch itself isn't resealable. The larger bag that holds the pouches, however, has a sturdy zipper seal to keep unopened pouches protected from air and moisture.
What Is The Best Way To Handle Used Grounds On The Trail?
Following Leave No Trace principles is critical. The golden rule is simple: pack it in, pack it out. This includes your used coffee grounds. Never scatter them at your campsite. Let the used pouch and grounds cool completely, then tuck them into a small, sealable bag you've brought for trash. This keeps your pack clean and leaves the campsite pristine.
Ready to brew your own perfect cup, wherever adventure takes you? Lost Without Coffee Co. crafts fresh, bold coffees designed for exactly that.